Hi everyone-thank you so much for your interest in my little project. I made another and took pictures along the way. With making a second one I worked out a few bugs and hope you will enjoy making some of these for your holidays. If you are a beginning sewer don't worry-I'm no expert. And for you that are experienced-please don't laugh-remember you were a beginner at some time too :)
The pictures are pretty self explanatory but here are the basic steps.
1. Cut 2 pieces of fabric and one piece of batting.
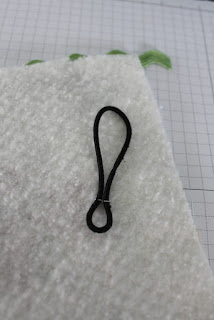
2. Pre-sew your ric-rac trim and the hair band closure to one piece of fabric.
HINT- whatever hangs over the edge above the fabric will end up INSIDE the piece. Whatever is below the top edge will be on the OUTSIDE
3. Sew the layers together rights sides together with batting on top. I did a zig zag then a straight stitch on the inside of that
HINT -leave a small opening on the side to be able to turn it tight side out
4. turn right side out and top stitch around to close the opening.
5. turn up a small amount to make the pocket and top stitch that
6. sew on the button and finish with a 1/2" circle of DSP.
Have fun with it and remember you can click on any photo to make it larger. I'm posting one more project today and then I'll be back tomorrow with the twisted card tutorial/hints for success.
Have a great day!


like the tutorial and the fabric you choose for this..i would like to keep it in mind and will use for Gift Card envelopes..thanks for sharing it.
ReplyDeleteYou have done great job.I love your gift card and i give my friend
ReplyDeleteon his marriage.
Discount card printing
They often send out specials and discounted albums that are available at a lower price for a very limited period of time.
ReplyDeleteAAPKI NEWS
AAPKI NEWS